

I loved making this costume despite the bruises, blisters, and blood. It seems I say this after completing every project, but this is hands-down my favorite cosplay to date.

Early Anya Concept Art
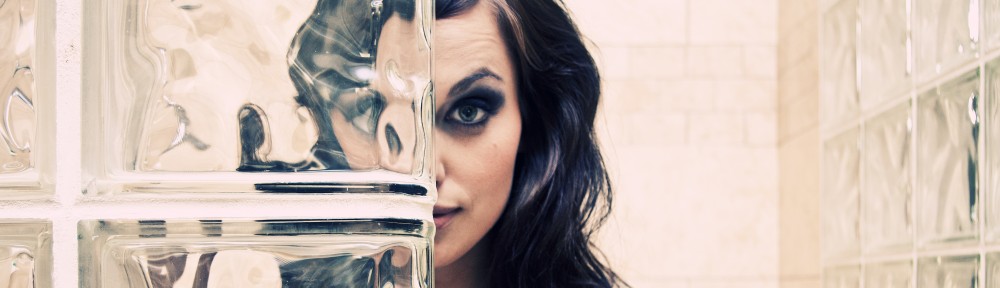
Let’s start with the motive! Gears of War is one of my favorite game franchises. Not only do I love the games, but I’ve read all the novels and comics so to stay caught up on cannon. My fandom landed me a spot on the Game Informer/Gears of War 3 cover story team, and that particular trip is when it was first hinted at that the women of the Gears universe would be taking up COG armor. Our suspicions were confirmed when the final cover art arrived at the office, showcasing Anya in full combat regalia.
My 2010 costume roster for San Diego Comic Con was already full, but as always, I had begun to plan the subsequent year. The difficulty of the costume was a huge selling point, as I wanted to continue challenging myself and learning new skills. The fact that I hate sewing and prefer to work on armor and props helped with the decision, too.
Despite my hatred of sitting at a sewing machine, I made a pact that I would create the entire costume from scratch. I wanted to take full ownership of final product so I could proudly say that I made everything myself. Online tutorials and advice from friends were pivotal to finishing the costume, however, and I’m thankful to everyone who lent a hand.
I started the costume about seven months ago, although I mulled over its construction for more than a year. One of my Minnesota friends – Rachel Dangerfield – aided me in fabricating the corset and pants. Finding fabric was tough, as I was going off very early concept art and couldn’t tell at the time if her armor was leather or canvas. The color was suspect too – sometimes appearing tan, and others a warm grey. I had to dye some of the fabric to get the right tone.
Rachel worked on a second corset and set of pants in tandem to mine for a Sam Bryne costume also slated to debut at SDCC. For a handful of weekends we worked side by side, making it much easier for me to wrap my head around the complex task. When finished sewing I added dozens and dozens of dark grey brads around the lighter patches on the pants, and did the same in vertical lines across the corset. My fingers were raw by the time I was done.
After polishing off the pants and corset I moved onto a acquiring a few easier items to give myself a mental break. Tracking down a set of official COG tags was easy. The blonde wig was a bit tougher, as the cut from the concept art is quite unique. Next I ordered a grey athletic tank and ironed STROUD over the left breast, as I wasn’t sure what would be visible under the armor at that point in time. I also ordered a crimson omen patch from eBay, and altered it with fabric markers to fit the color scheme. At this stage, I began looking at footwear. I zeroed in on motorcycle boots before further narrowing the focus to motocross apparel, hoping to find something appropriately oversized and exaggerated like in the game. I eventually settled on a pair of THOR boots. As far as other purchased items are concerned, the gloves came from the sports section of Target.
At this point I was certain the costume would come together and started talking to Cliff Bleszinski about the project. He was amazingly helpful and provided me with additional reference material to ensure the armor was accurate.
At first I wasn’t sure which approach to building the armor would work best, although I had researched several options. The most accurate option would be to use the male pepakura template and scale it down for the female form. For those of you not familiar with pepakura, it’s the resource used to make many amazing Gears of War, Halo, and other armor-heavy costumes. Essentially you print a template on standard paper, fold and tape it together, and then coat it in various primers and paint to harden it. After seeing a WIP build of Marcus’ armor in person, however, I realized the design was too different from the female armor to use. As there was no female COG pepakura template yet, I went back to the drawing board.

Anya Without Armor
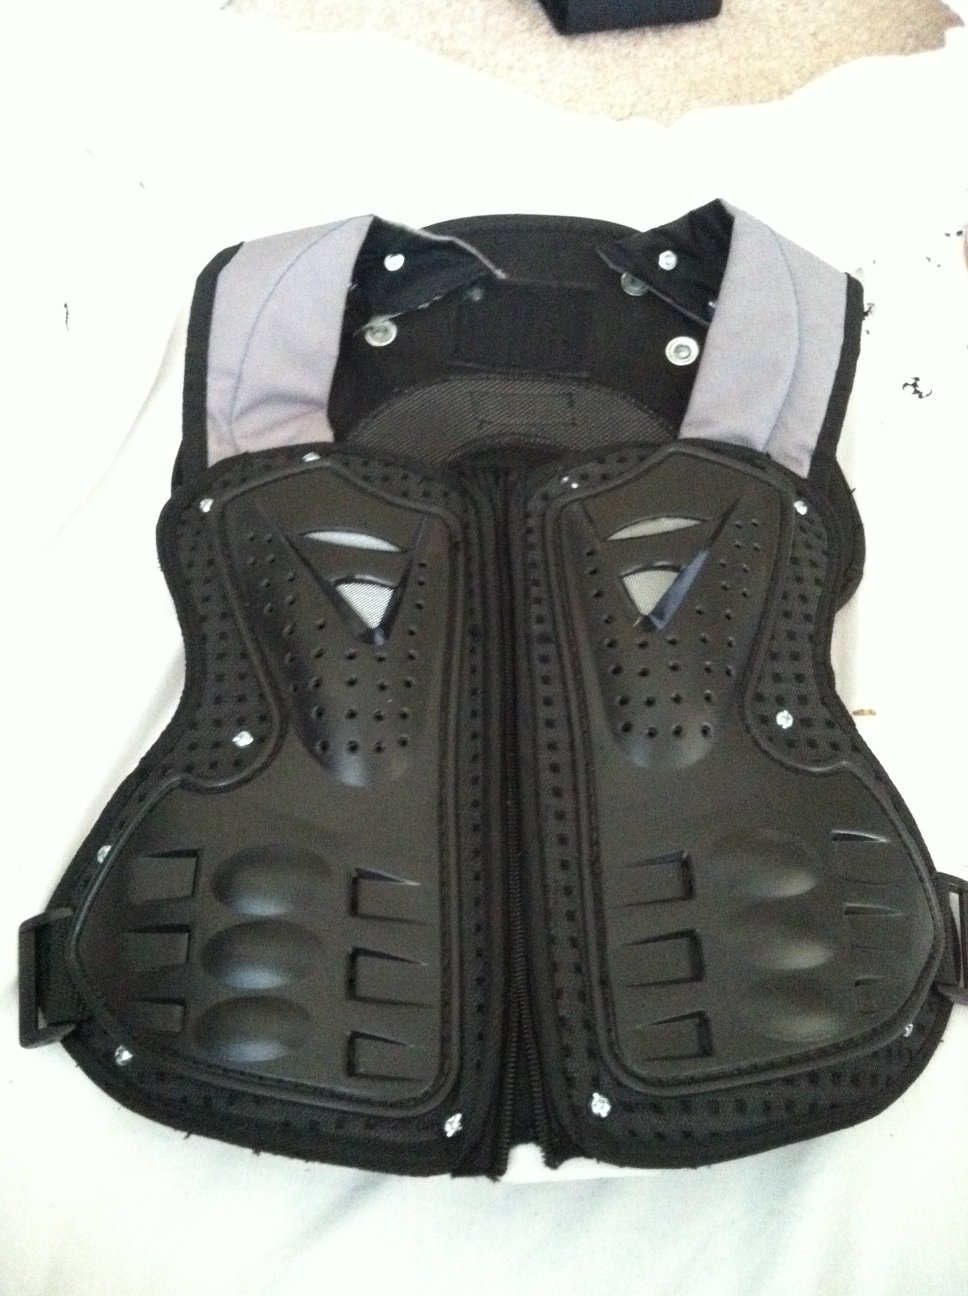
I’ve worked with Wonderflex many, many times, and it was the next method I strongly considered. I voted against it in the end, as Wonderflex alone is quite thin and wouldn’t look durable. I came to the conclusion that a hybrid of materials was needed. I revisited the world of motocross and acquired zip-up torso armor as a starting point for the COG gear. After weeks and weeks of searching online, I found a set that was similar in shape to what I needed and ordered it online.
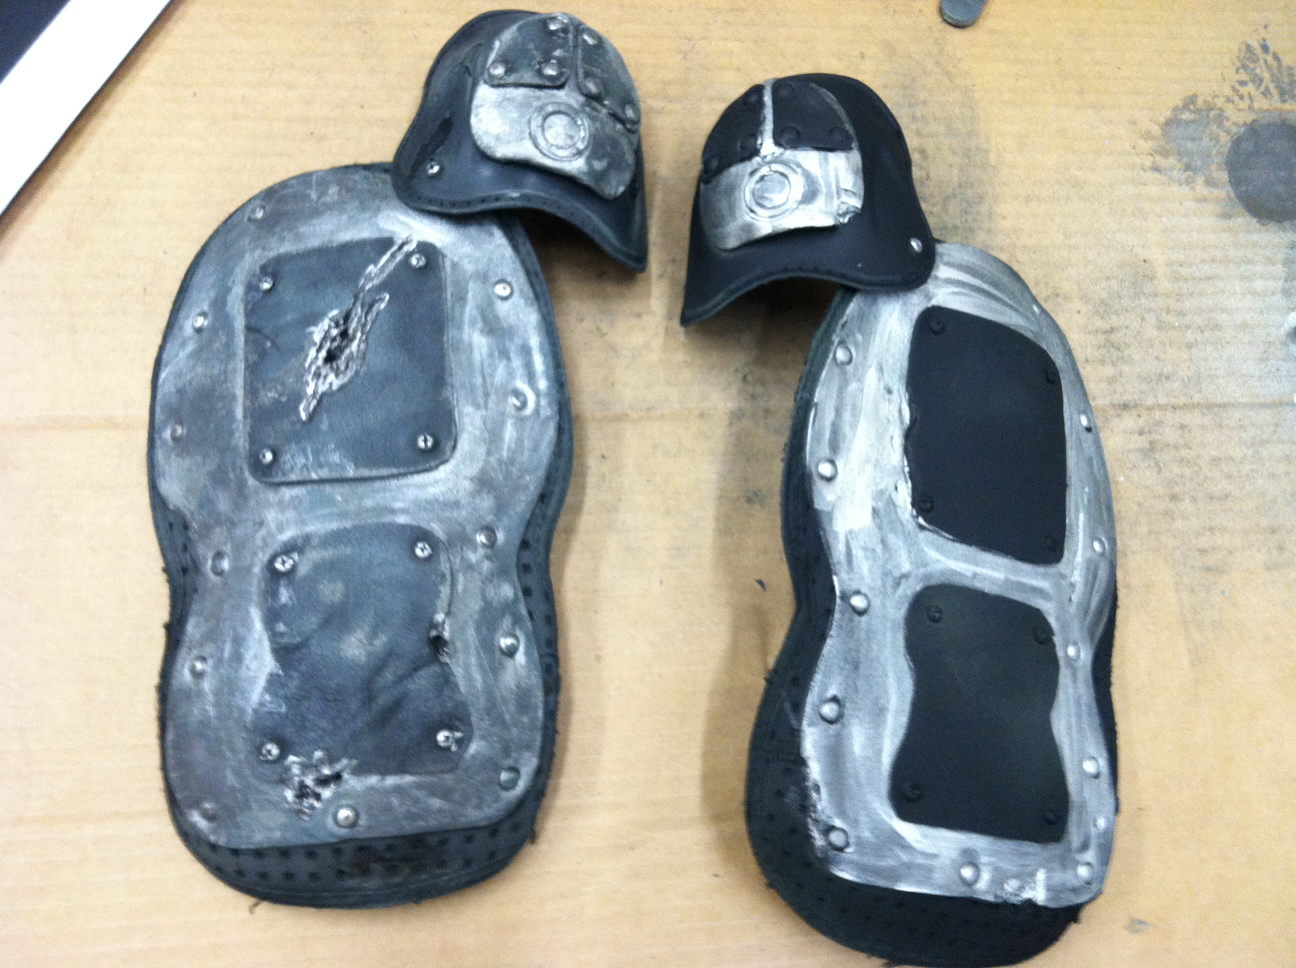
I deconstructed the armor entirely the day it arrived at my house. After removing the netting that held the chest, back, shoulder, and wrist/elbow pieces together, I started to re-appropriate everything for a new use. The shoulder pieces worked perfectly for kneepads, and I removed all the ridged plastic from the front of the armor to use on the back – but more on that later. The forearm/wrist guards were kept as is for the most part.
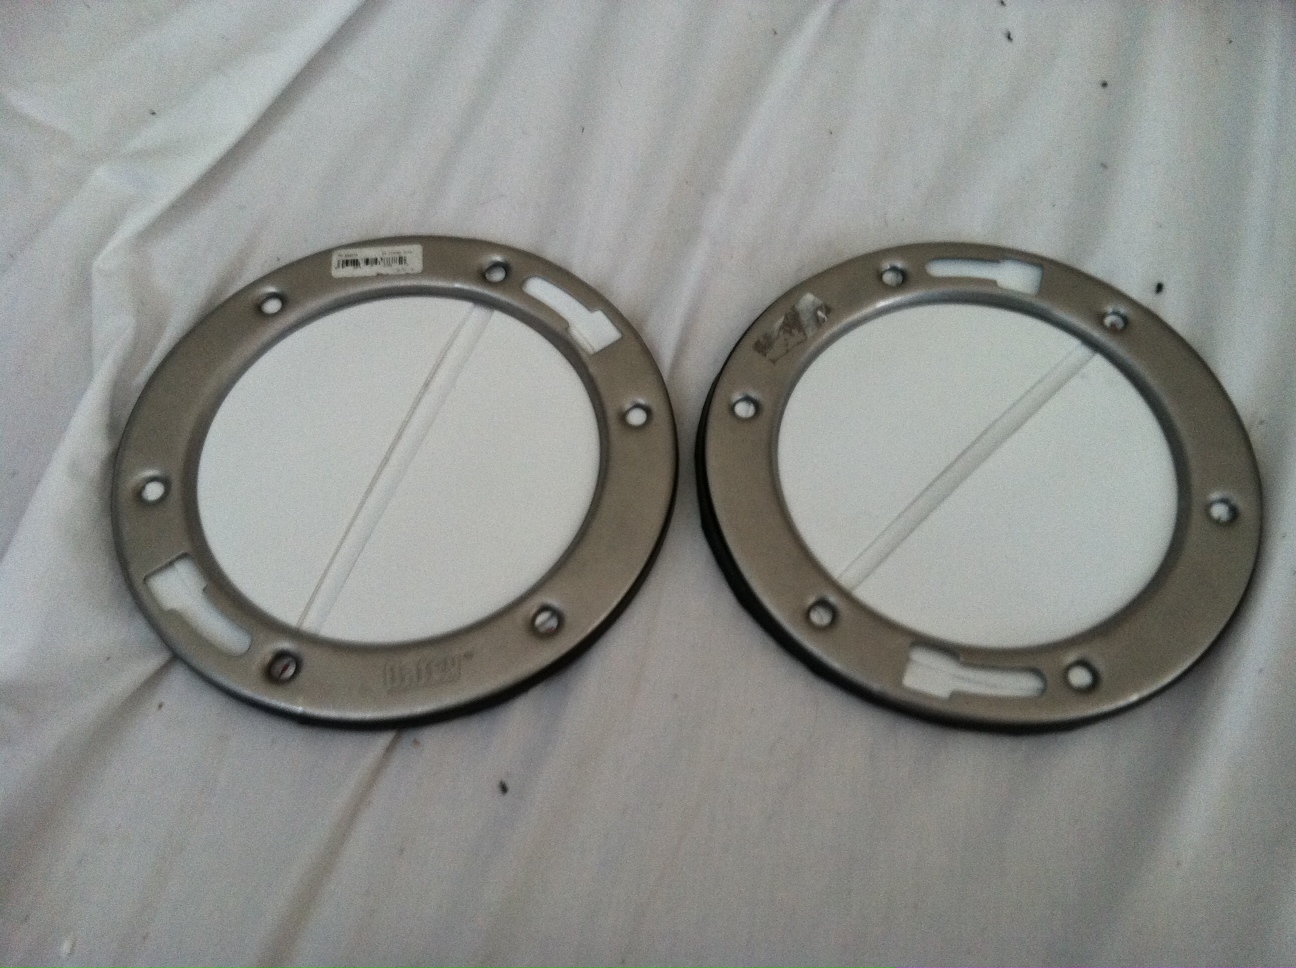
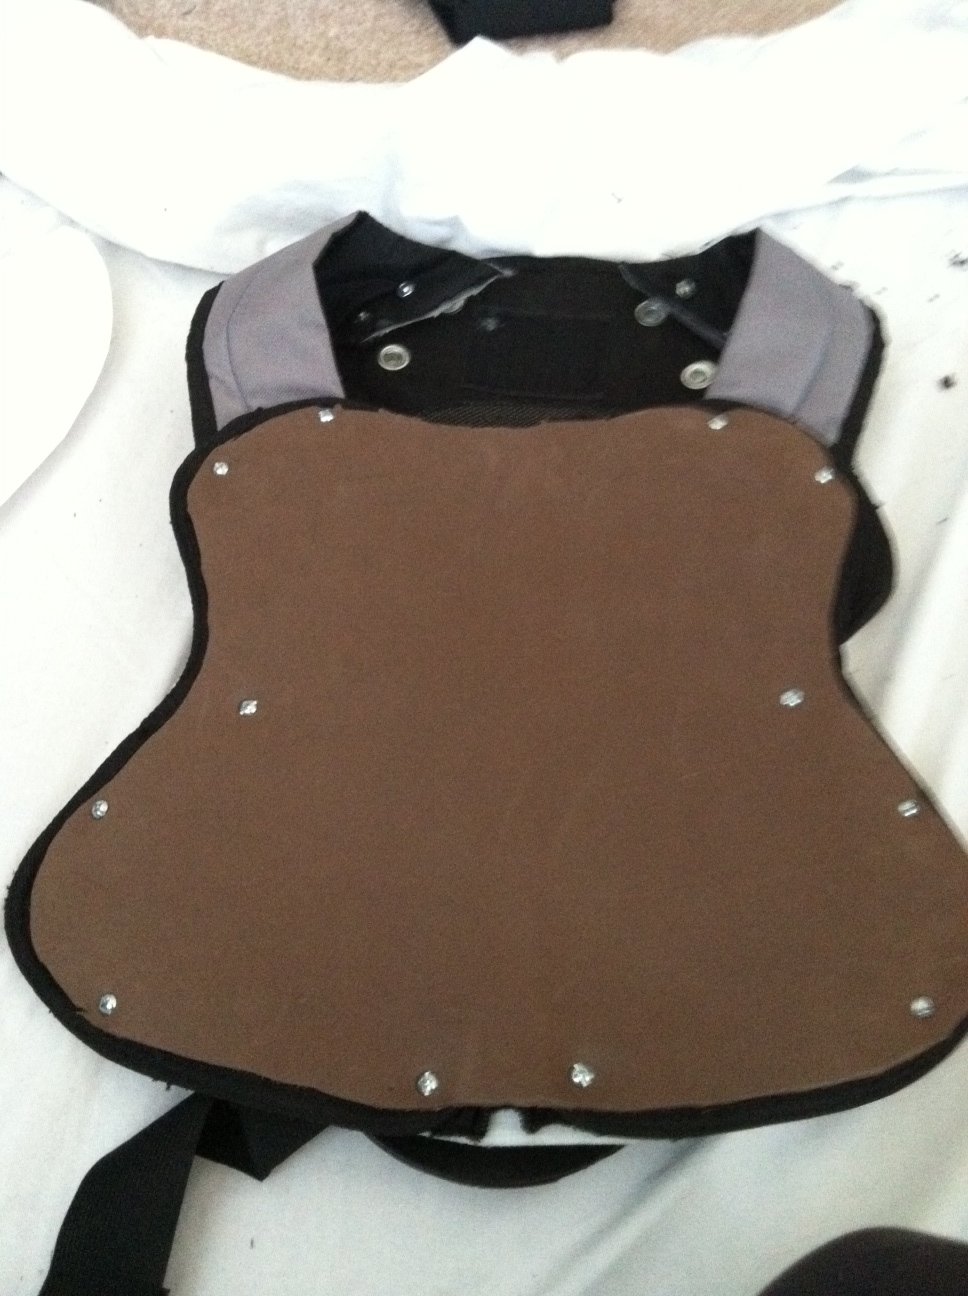
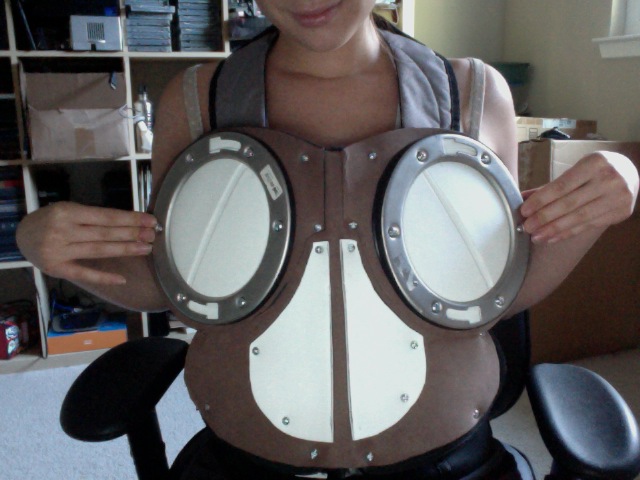
To build up the chest piece, I lined the back with Wonderflex to strengthen it and form it to the specific shape I was looking for. I then began to pattern out basic shapes from the reference material using paper – folding the paper in half before cutting to ensure each side was symmetrical. After establishing the right patterns and layers, I transferred them to craft foam and attached the pieces with glue. I actually have no idea what the large circle pieces on the chest are, but I think they’re somehow associated with toilets as I found them in the plumbing department of my local hardware store.
Properly securing everything in place became the next priority. I used both a drill and a leather punch to make holes for the various nuts/bolts that hold together the layers. When all was said and done, the inside of the chest piece was riddled with pointy metal that needed to be filed down for comfort sake. That came much later, after I borrowed a tool tough enough to cut the hardware flush. Until then, trying on the piece was very uncomfortable.
I cut up an old backpack and used the straps to join the front and back pieces of the armor via the shoulders, reinforcing it with Wonderflex at a later time. I moved onto the back of the armor before attempting the LED shoulders pieces. The back is a hodge-podge of pieces that I removed from the chest place, as mentioned. I also used some sort of vent for a dryer, and tubing from a vacuum. Again, lots of hardware was needed to keep everything in place.

Anya Action Figure Prototype
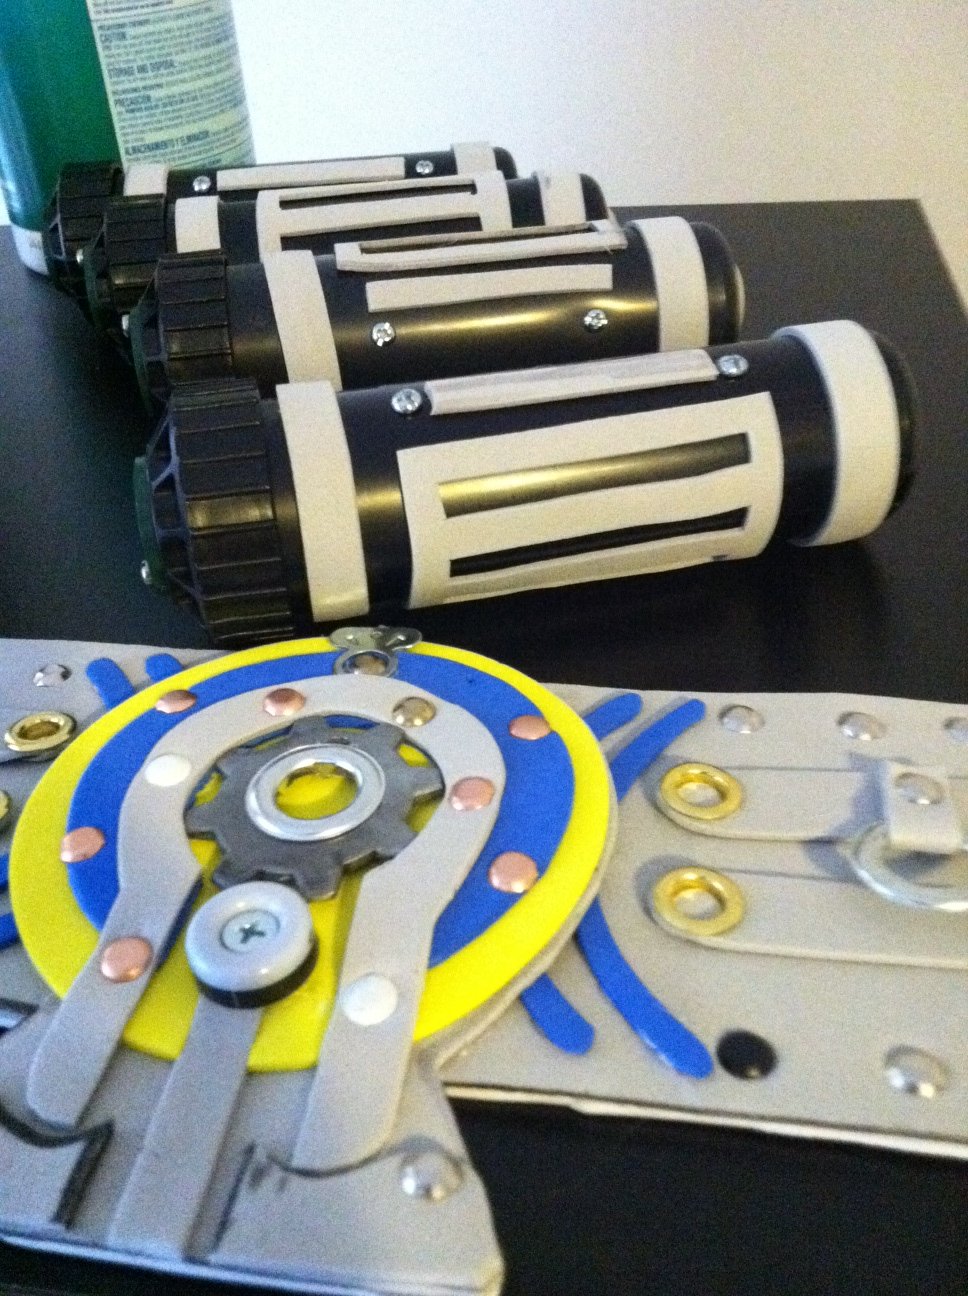
The shoulder pieces were the biggest challenge, and something I was working on two hours prior to leaving for San Diego. Having just moved to California, I couldn’t rely on my dad to help me figure out the tricky wiring needed for a proper LED setup. That didn’t keep me from attempting that particular approach, but I wasn’t able to get it working as needed. In the end, I used two gum tins from Starbucks to house the lights, cutting holes in the lids with tin snips. Not able to find the right color blue LEDS, I instead cut up a transparent bottle of laundry detergent that was the appropriate blue color. Then I lined the inside with tin foil to optimize reflection, and positioned two clip lights from Fry’s Electronics at the top of the structure. The batteries and buttons are hidden under the shoulder wraps.
By comparison, the rest of the armor was simple. Again, I patterned out each piece on paper before moving to foam. This is how I built up the forearm guards, the belt, the kneepads, and the boots. The boots were challenging, but the ornate belt was a nightmare. It’s probably my favorite part of the costume now that everything is said and done, however.
After finishing the armor, I used a soldering iron to burn in battle damage and make it look worn and weathered. I learned from my Mad Moxxi costume that clean and crisp isn’t the way to best represent a post-apocalyptic world, and wasn’t going to make the same mistake twice.
After adding a bit of character to each piece, I sprayed everything a matte grey color to prime it. From there, I coated each item with black and silver paint where appropriate. When the paint was fully dry, I sanded it down with a block to make it appear dull and worn. I also stippled a warm brown on top of each piece to make it look dirty. Red and yellow were used in various locations for accent, which I again sanded down appropriately. In terms of paint, I polished off the look with little flecks of a rust color near any damaged pieces. Everything was then coated with a clear (satin) coat, and again sanded down so that only a few areas looked reminiscent of once-polished armor. The whole process took a week to finish when taking into account drying time.
As far as props are concerned, wandering the halls of the hardware store resulted in securing sprinklers that worked perfect for grenades. A bit of foam and a similarly distressed paint job achieved the aesthetic I was looking for.
The last piece to the project was the complicated belt/gun harness that Anya wears. Constructing it took the final three days I had free prior to Comic-Con. I made the “saddlebags” (as I call them) from scratch, patterning and stuffing them before sewing them shut and adding the accent cording. These were attached to a traditional black leather belt. The back piece was leftover from the motocross armor, which I again built up with craft foam and a crimson omen buckle I found online. I used Velcro to adhere the delicate front piece to the belt, so that I could remove it and still access the buckle to take the entire getup on and off.
The drop-leg holster is made out of cardboard inserted into a pouch I made – again accented with the thick leather cording around the edges. I used the same method to construct the canteen – cardboard, foam, fabric, and paint.
The last bit of polish the costume needed was the Lancer, and Cliff was nice enough to lend me one for SDCC. At that point, I’d put $1000 into the costume and was tight on funds, so the gesture was a godsend. The team at Epic must have enjoyed the costume, however, as I was gifted the Lancer after the convention concluded. I was quite happy, as evidenced by the picture below!

<3 <3 <3
As for the convention itself, I was approached a few weeks prior to SDCC by CNN with an offer to highlight the art of cosplaying via a video feature. I was very, very excited about the opportunity, and it is part of the reason my costume turned out so well. The idea of debuting a mediocre costume on CNN pushed me to work extremely hard on it.
My boyfriend and I drove down to San Diego a few days early so we could record the feature, and I had a blast. As with every SDCC, I had my magic makeup artist Hydred Makabali on hand to help with beauty makeup, blood, and battle scars. She did a fantastic job making everything look dirty and distressed. Note – if you’re thinking of mussing up some clothing for a similar look, real dirt and mud doesn’t work as well as you might think. It eventually dries up and crumbles off. Instead, we used brown and black hairspray and it worked like a charm. You can check out the video from CNN here.
My favorite photographer Leonard Lee (Ljinto) also came down a few days early so we could take advantage of the perfect setting for a photoshoot. I’d been planning the costume long enough to have taken note of the U.S.S. Midway near the convention center the previous Comic-Con. At that time, the clips I’d seen of the game took place on a battleship, and I figured an aircraft carrier would do nicely as a setting for a shoot. The location worked perfectly and the staff was extremely helpful. They let us run around like we owned the place.
I ended up wearing Anya both Thursday and Friday at SDCC – a first for me as I’ve never worn the same costume to a convention more than once. Highlights from the show include attending the Gears of War 3 panel and taking photos with fans, chilling with the Epic/Microsoft crew at the Gears of War 3/American Chopper reveal, and attending the Microsoft event later that night.

The Epic Games Crew
I was also stopped by Entertainment Weekly and taken to the top of the Hard Rock Hotel for some professional photos. Additionally, Destructoid was nice enough to feature Anya, as well as The Chive and Kotaku. I couldn’t be happier with how the week went. I’m excited to put Anya back on later this fall.
Compared to costumes requiring high heels and restrictive fabric, Anya’s getup wasn’t particularly painful. That being said, I constructed the chest piece a tad too tight and I couldn’t fully expand my ribcage for the duration of wearing it, making it a breath of fresh air (literally) to take it off. I’m not entirely sure how long I’d last wearing it in a wartime setting, as my mobility was severely limited, but there is something to be said for looking intimidating, right?
Hope the above tips and tricks help if you’re looking to construct any of your own COG armor! Feel free to ask for clarification below, and take a gander at my WIP gallery for a better look at constructing the costume.
WIP Gallery


Anya Stround Portfolio
 Flickr Album Gallery Powered By: Weblizar
Anya Stround Portfolio
Gears Of War 3 Paris Launch Event


Maria we ready to play game “GEARS OF WAR” are you ready…
Ok. I need a wallpaper of this.
Oh! look so great I’m from Mexico and here non cant get cosplay like this, I appreciate so you can’t help to make a this cosplay please! *-* I hope your answer 😀
looks amazing with the short blonde hair~!! nice cosplay
“Boyfriend”??!!! That’s it, I’m outta here….
Where did you find the Motocross Chest plate? i can’t find a suitable one
Hello Lauren!
I got my set on eBay! Similar to this one: http://www.ebay.com/itm/new-genera-Jacket-Body-Guard-Bike-Motocross-Gear-honda-Motorcycle-Body-Armour-/160751233927?pt=Apparel_Merchandise&hash=item256d852b87&vxp=mtr#ht_2390wt_1378
Hope that helps!
Hello. First of all I love your work.
Secondly, I myself am working on my own female gear. Particularly Alex Brand from the gears of war comic.I must say that it is proving to be very difficult considering there are not many cosplays of female gears. My question is..Where did you find the material you used on the pants on the outside of the thighs and inner thighs..I’m having so much trouble with it. =blue
Hello Blue! I actually found it sifting through options at Joanns. It was white, however, and I dyed it the grey color! I’m sorry I can’t be of more help! Best of luck with Alex - I’d love to see photos! 😀
hey what did you use for the corset part? (the padding) Great costume btw!!
Hey Sabrina! I’m not sure the exact type of fabric I used, to be honest! It seemed like a roughspun webbing, of some sort. Very thick, and very stretchy!
Hi megan,I want to make my own cog armor, would you please tell me where you get the paperkura template? Its dificult to use that?
Awesome costume!!! =)
For the motocross gear you got, do you remember what size it was? Thank you!! =)
Hey Mindy! I’m pretty sure I got a size small, as all of the armor was for men. Fit very well on me!
Thank you!! One more thing =) What did you use for those non screw round things that are decorated on all the armor? And those hollow circles that when in the armor it shows through them if that makes sense. I’ve been searching at the craft store and home depot and can’t figure out anything close to that. Thanks again for your help!!!! =)
Hey Mindy! If I remember correctly, they are large grommets! This what you’re talking about??
http://www.hikerusa.com/files/grommets___washers_angle.jpg
Yep, that is exactly what I got! lol As always, thank you!!! You’ve really helped me make my own Anya costume and I’m so excited to wear it for halloween once it’s completed!! =) The last thing I couldn’t figure out was how to attach the foam pieces to the boots since they have all those buckle things in the front. Did you glue them or velcro them somehow? lol Thank you sooo much for taking the time to help me, I know you are super busy!!! =D
I totally hot glued them! XD
When in doubt, hot glue works wonders! I’ve had to touch it up a few times, but for the most part it’s been super secure! Please send photos when you’re done, I’d love to see it!
Hey megan, I was reading you page and I thought it’d be good for us to play gears 3 together? My gamertag is ThDevilSlayer92 , I think it’d be awesome if we played together let me know asap please :p
Thank you for all your help with making my Anya costume! I wanted to share the final outcome with you! Here is the album to my pics. I ended up winning best costume at the bar we went to and won $200! Thanks again for everything, hope you enjoy! =) http://www.facebook.com/media/set/?set=a.4108904888661.2141282.1464247277&type=3
The costume turned out incredible Mindy! Thank you so much for sharing it with me! 😀
Here is one of the resources I looked at Maga! http://www.405th.com/showthread.php/7160-Cog-Armor
Hi! Meagan Marie! i am making my own Anya costume. and your blog and the photos are so good i know where to start now!!.Thank you so much!! 😉
Congratulations!
You have made the front page of our gaming blog! Because of your excellent work as a writer and artist, I felt it worthwhile that you made our latest news post.
Don’t get too excited, our site sucks. But I felt it worthwhile that one of your Anya and one of your Marie Antoinette cosplay photos were featured on our newest post. Direct link is below.
Welcome to the obscurity that is HD:
http://hiddendefinition.wordpress.com/2013/11/26/playstation-4-and-xbox-one-officially-here-the-last-of-us-single-player-dlc-announced-bioshock-infinite-burial-at-sea-dlc-pt-1-released-and-ex-game-informer-editor-meagan-marie-makes-a-good-impres/